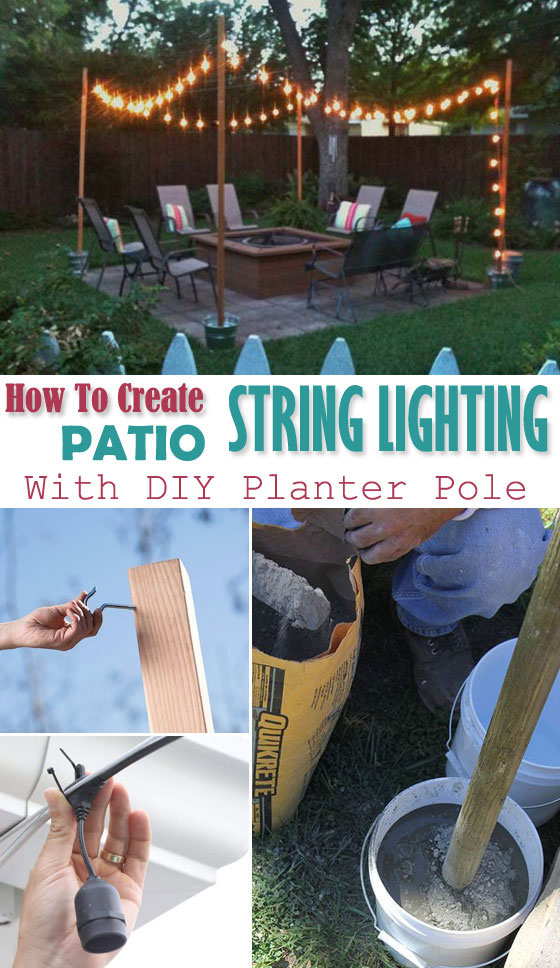
How to Create Patio String Lighting with DIY Poles
Lighting is an important feature when it comes to outdoor spaces, especially during summer nights. It can make the evening feel special and cozy. If you have a pergola in your home’s outdoor space, it’s easy to string some outdoor globe lights around it. However, not every house has a pergola, so you need a solution to hang your string lights. One of my friends suggested using concrete and a gallon bucket to make a DIY string light pole planter, with a pole for holding up string lights. It’s a great idea, and since you don’t have to install anything permanent for this setup, it’s also a cool DIY project for a rented house. Let’s get started!
*Before we get started officially, let’s first check out another easier way to install patio lights poles for hanging string lights in your backyard.
Learn how to create your own stylish string light poles with this easy DIY tutorial using PVC pipes.
The first step is to dig holes for the outdoor string light poles that are 24” deep. These holes should be placed at the two outside corners of the patio. If needed, additional holes can be dug for additional support.
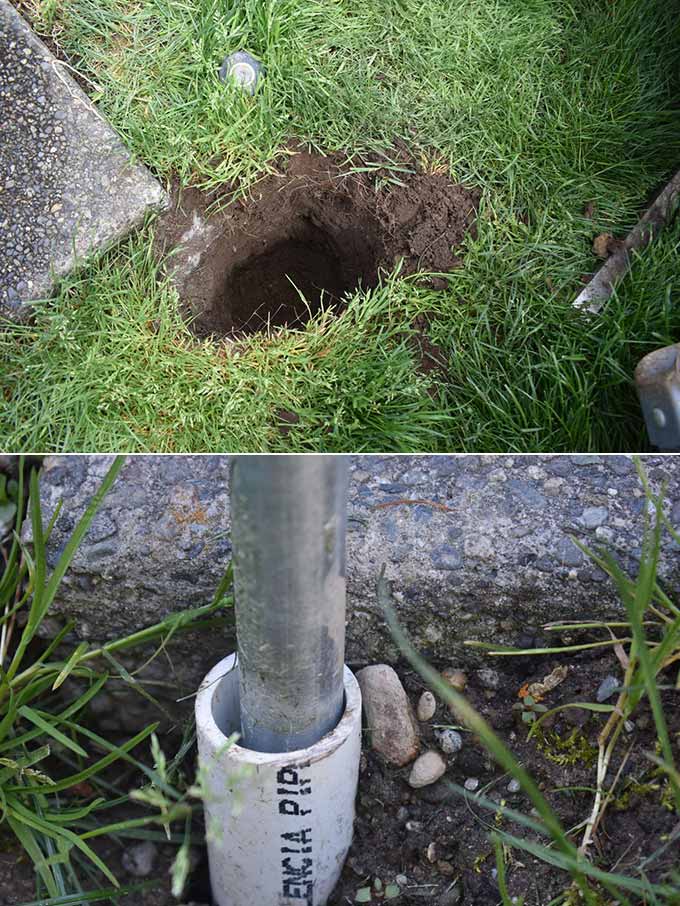
Next, place one of the cut pieces of PVC pipe upright in each hole, and loosely pack the dirt back in around it. Alternatively, cement can be used to secure the DIY light poles in place.
Once the PVC pipe is in place, put the conduit pole into the slightly wider PVC pipe and hold it in place with a vertical level. Pack the dirt in around the PVC pipe to secure the metal pole in place.
Cap the poles with 3/4″ squeeze connectors to hold the light cord in place at the top of each pole. Then, screw three hooks into the siding to attach the string lights on the house side.
Finally, hang the heavy-duty string lights on the outdoor string light poles, ensuring to wait to screw in the bulbs until after they are hung to avoid any breakage.
Check jessicawellinginteriors.com for more details.
*Now let’s go back to the tutorial for making a gallon bucket string light pole, including how to make a concrete light pole base.
STEP 1: Materials for outdoor globe patio string lights
• plastic 5 gallon bucket OR homemade concrete tall planter OR wine barrel
• 1 bag or more 50-60lb quick set concrete
• 3 J-bolts(each bolt with 2 nuts) long enough to go through the pole and 2 corresponding nuts for each bolt OR C-Hooks
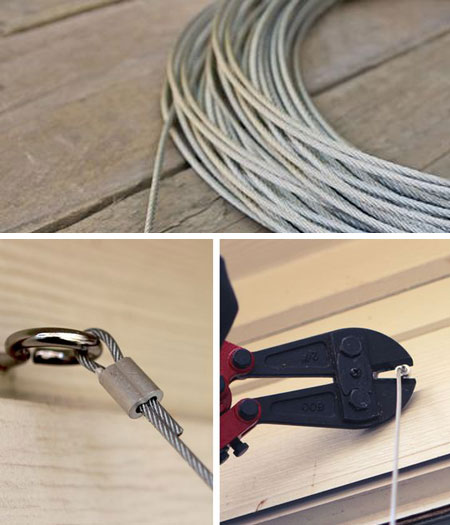
• vinyl coated galvanized steel cable (optional)
• String lights
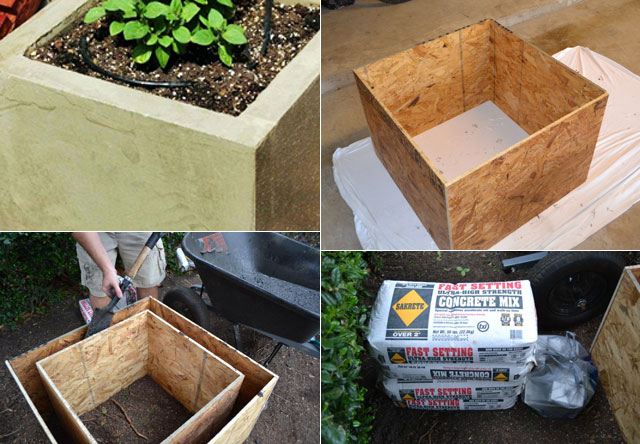
STEP 2: If you don’t have a ready-made 5 gallon bucket concrete post or a wine barrel, you’ll need to make a square concrete planter. This is a DIY project that can be customized to fit your space. Concrete planters are durable and easy to decorate – you can even adorn them with mosaics.
If you’re looking for backyard light pole ideas, this DIY project is a great option. Once you have your square concrete planter, you can easily turn it into a light pole by attaching a post and string lights. This will create a beautiful and functional lighting solution for your backyard.
*Ps: How to make CONCRETE PLANTER?
Materials:
• The least expensive plywood available at Lowe’s
• Six 50-pound bags of quick-set concrete
• A reliable nail gun and large staples
Steps:
- Draw a sketch of the concrete planter according to the desired size and shape. Determine the dimensions of the planter and mark them on the sketch.
- Cut four pieces of wood or other material to create the outer frame of the planter. The size of the frame should match the dimensions of the sketch. Cut another piece of material to create the bottom plate of the planter.
- Assemble the outer frame by stapling or screwing the pieces together at the corners. Place the bottom plate inside the frame and secure it in place.
- Find a flat and level surface to place the planter frame. Mix the concrete according to the package instructions, making sure it is smooth and free of lumps.
- Spread a layer of concrete about 1.5 inches thick on the bottom of the frame, making sure it is level. Place the inset on top of the concrete, making sure it is centered and level. Leave a space for drainage at the bottom of the inset.
- Pour the remaining concrete into the frame, filling it to the desired height. Use a trowel or other tool to smooth the surface of the concrete. Allow the concrete to dry and set according to the package instructions before removing the frame and inset to reveal your new planter.
Detailed TUTORIAL can be seen here ===> modernmaizy.blogspot.com
STEP 3: Mix the cement. Place the pole in the center of a gallon bucket or wine barrel that has been prepared in advance. Slowly pour the cement mixture into the container, making sure to keep the pole upright and centered.
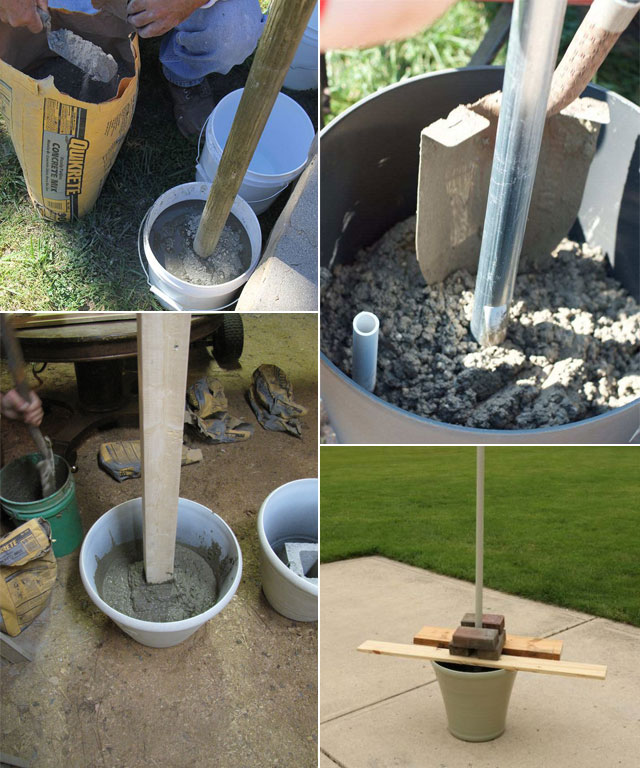
Image via: homedepot.com
STEP 4: According to your plan, determine the location and quantity of the string light poles. Use a cement bucket pole to secure each patio light pole in place. Measure the distance between each pole to determine what length of light strand you need.
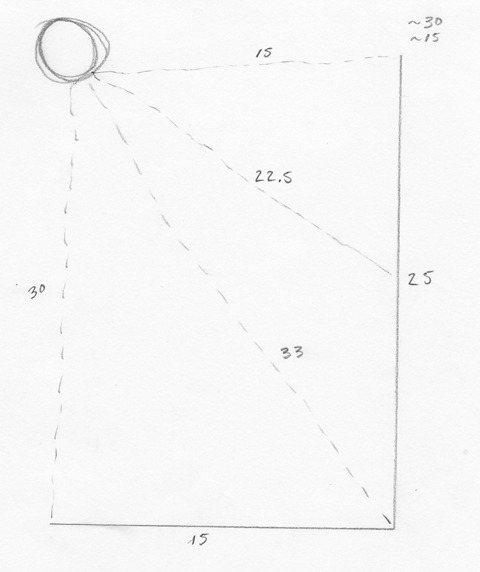
To help with the planning, you may want to draw a sketch of your patio or outdoor living space and mark the locations of each pole. This will ensure that you have enough string lights to cover the entire area and that the placement of each pole is optimal for your desired lighting effect.
Tips: There are various ways to string these lights in your backyard or garden. You could connect multiple light poles, attach a light pole to the fascia on your house (as shown in the sketch below), or connect a light pole to a tree.
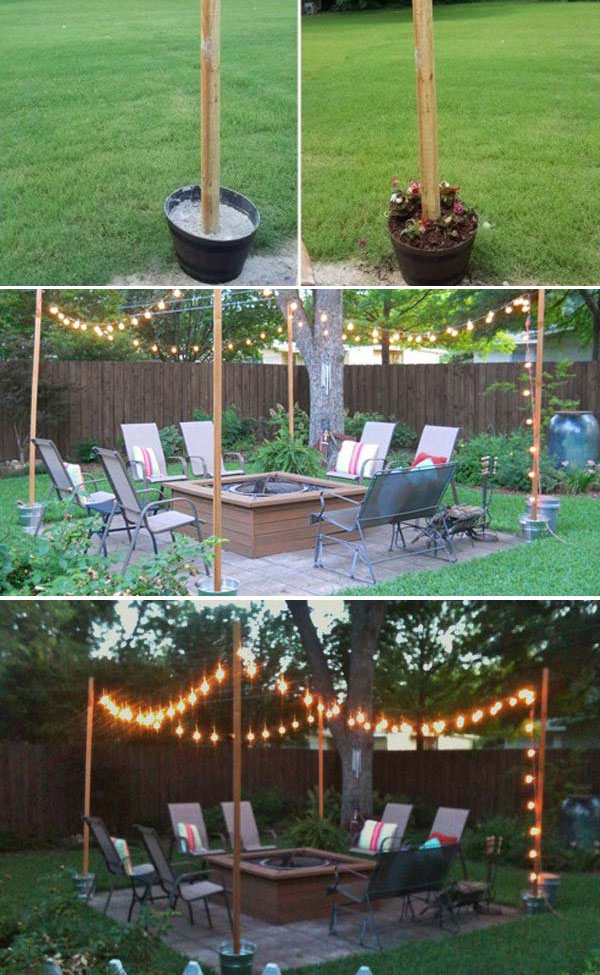
Above: example of multiple light poles connecting
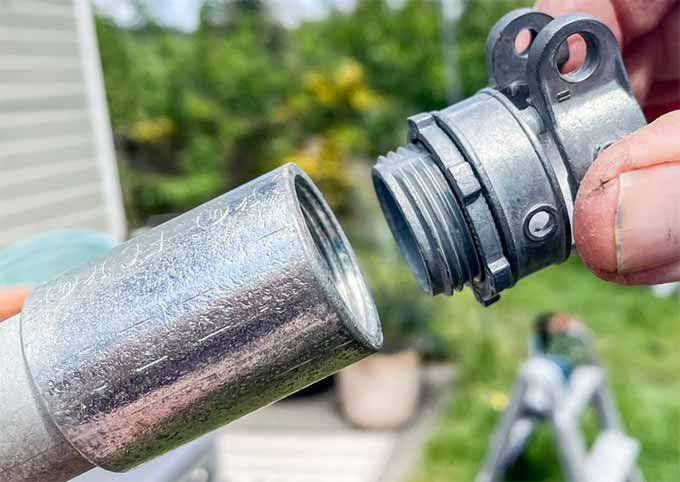
STEP 5: If you are using a metal pipe, drill holes to place the J-bolt using a nut on each side of the pipe (see image below).
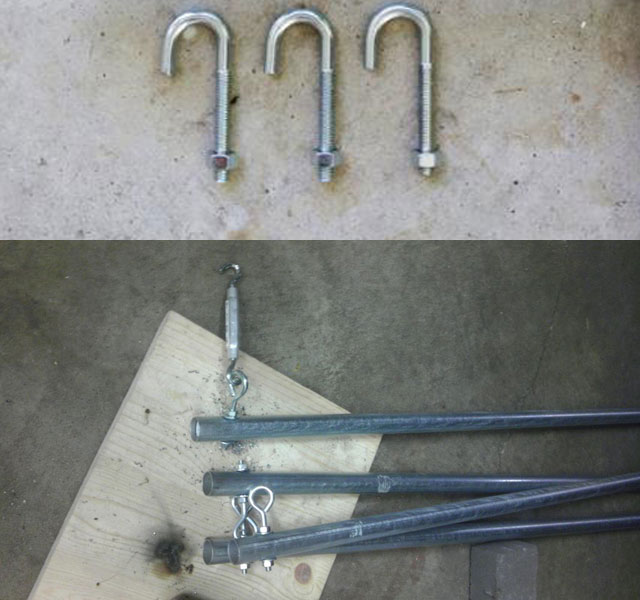
If you want to build with a wooden pole, pre-drill a hole at the top of the post for the C-hook that will hold the string lights (see image below).
Alternatively, you can use a patio light pole, which is specifically designed to hold string lights and often includes hooks or other attachments for easy installation.
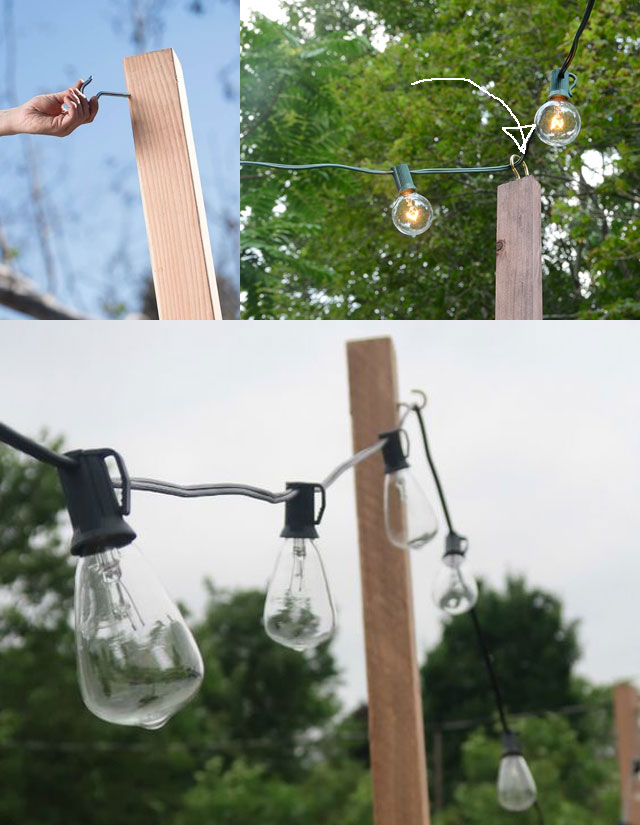
Image via: curbly.com & diynetwork.com
STEP 6: Place the eyelets onto the fascia or gutter line of your house where you want to hang the lights (see image below).

STEP 7: Set the steel cable to prevent the string light cord from stretching out over time, which will prolong the life of the lights (optional).
STEP 8: Use a ladder and zip ties to hang your string lights, starting with the empty sockets first. Make sure to hang the lights securely and evenly spaced.
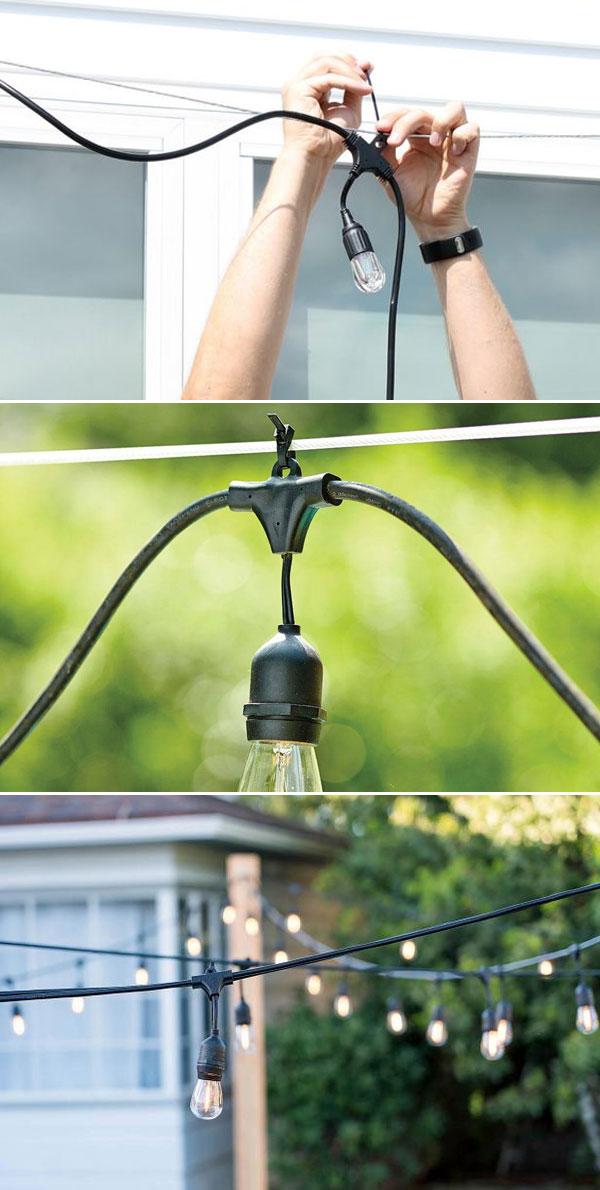
Image via: ashleybrookedesigns.com & ballarddesigns.com
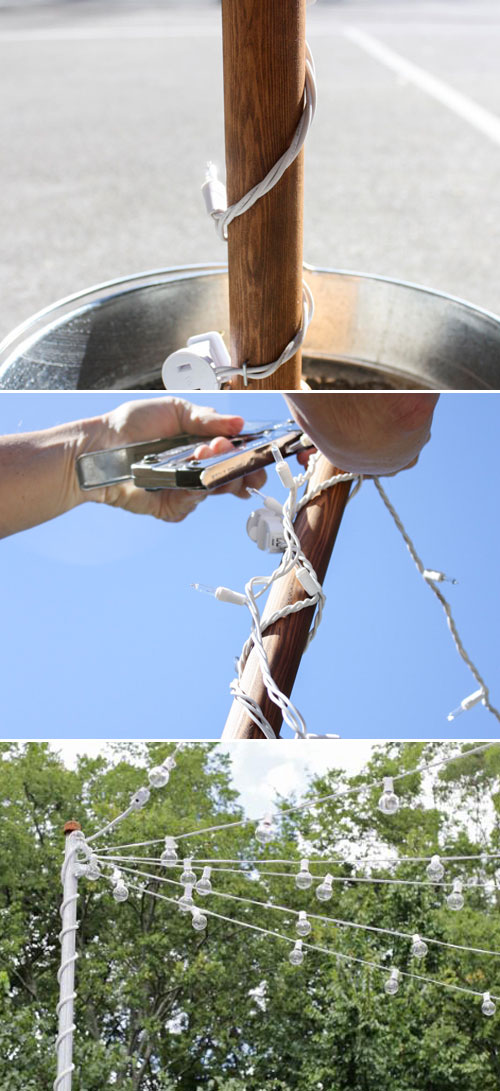
Image via: abeautifulmess.com & diy.dunnlumber.com