Lay a Stepping Stones and Path Combo to Update Your Landscape
If you’re looking to create a lasting impression on visitors to your garden and add a nice feel to the space, consider laying a stepping stone and pathway combo. Walkways not only serve a functional purpose but can also enhance the garden’s decorative style. There are many stepping stone walkway ideas to choose from to create a unique and creative garden path.
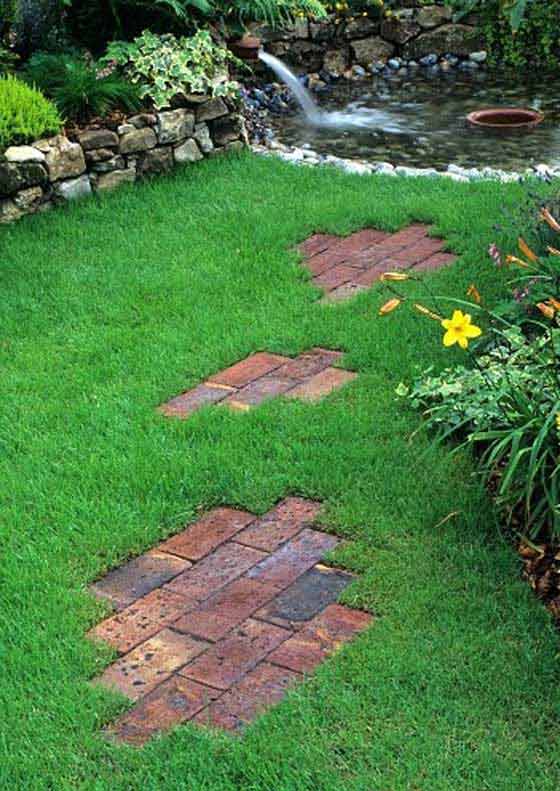
One such idea is to combine stepping stones in gravel, or mix river rocks with concrete stepping stones. Alternatively, you could place red brick stepping stones on top of a grass path. Regardless of which approach you take, a stepping stone and pathway combo can elevate the look of your garden walkway from plain to impressive. So, if you’re looking to enhance the beauty of your garden, consider laying stepping stones as part of a pathway design.
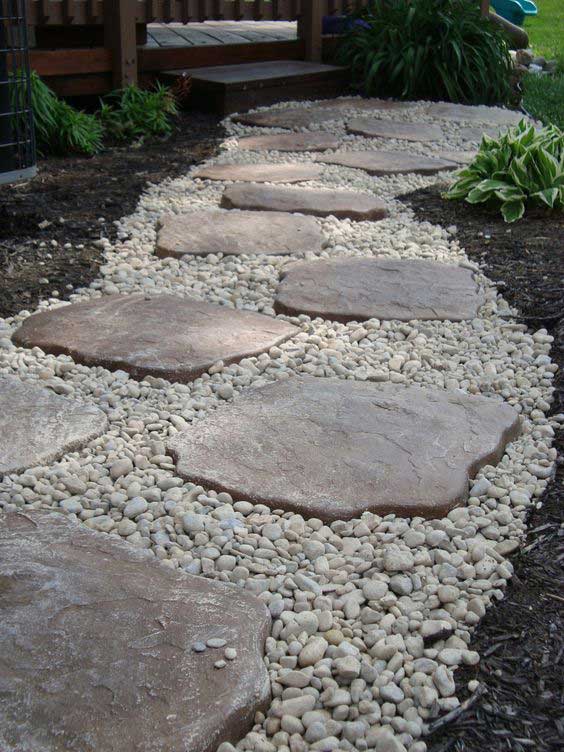
#1. Set stepping stones in a gravel walkway.
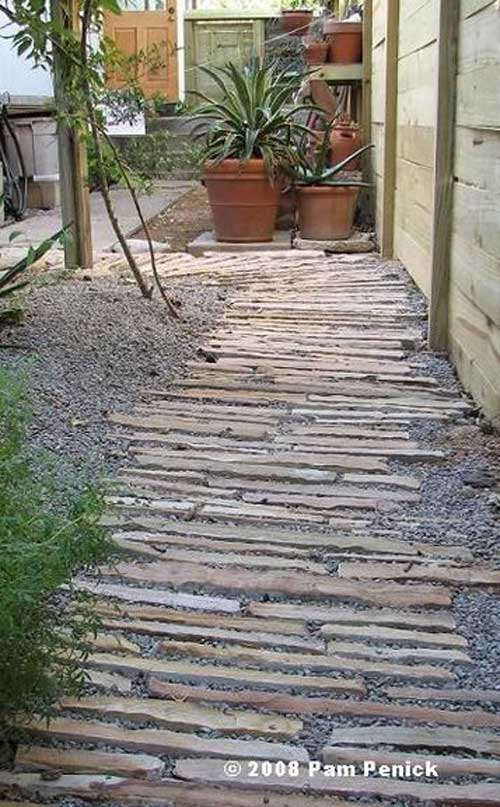
Image credit by Pam Penick.
#2. Create a brick pathway and accent it with concrete stepping stones printed with heart shapes.
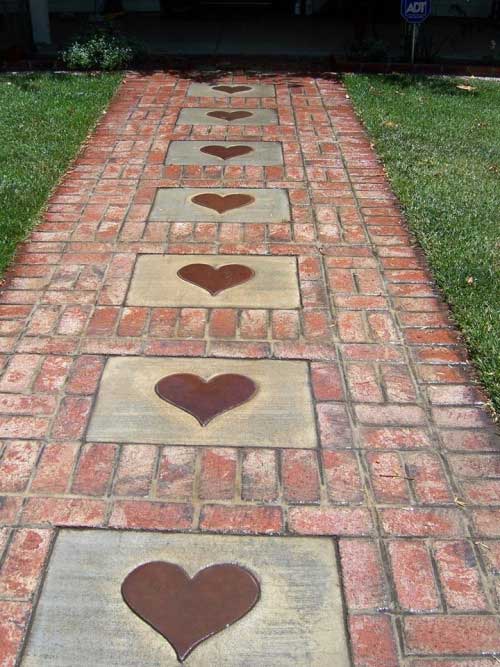
Source: montanarosepainter.tumblr.com
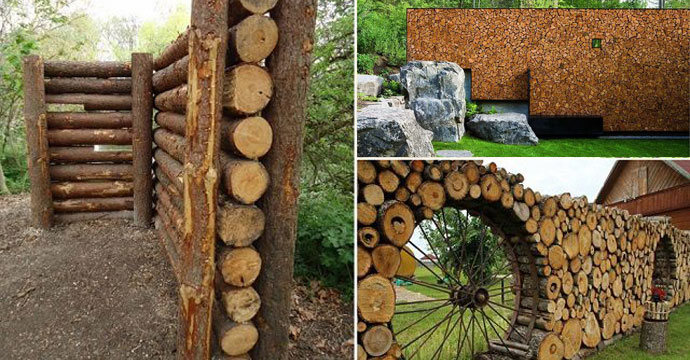
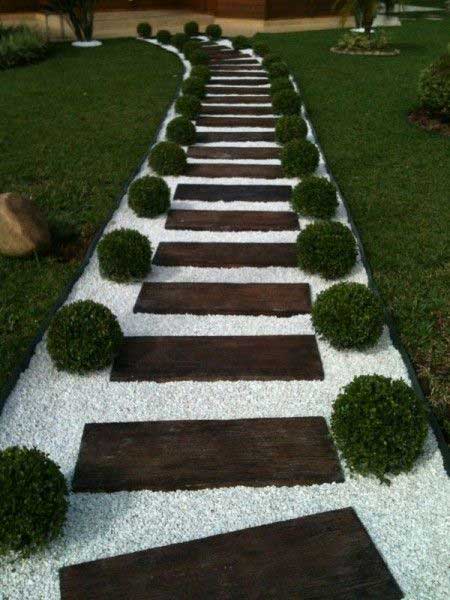
#3. Pave a garden path with river rocks or gravel and top it with log sleepers that can be used for paving, lawn, or patio edging.
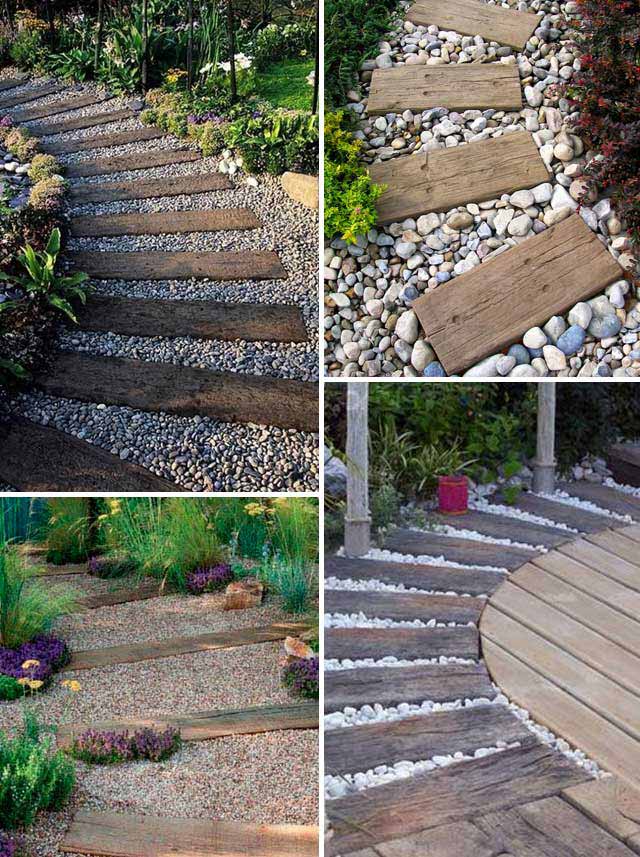
Source: houzz.com
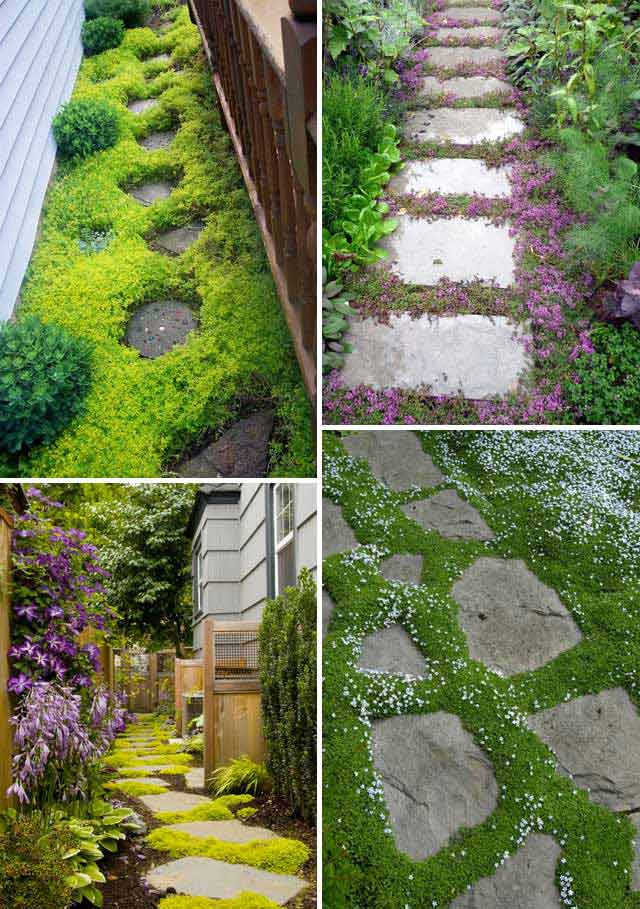
#4. Create a stepping stone path by laying square stepping stones over a grass and river rock area.
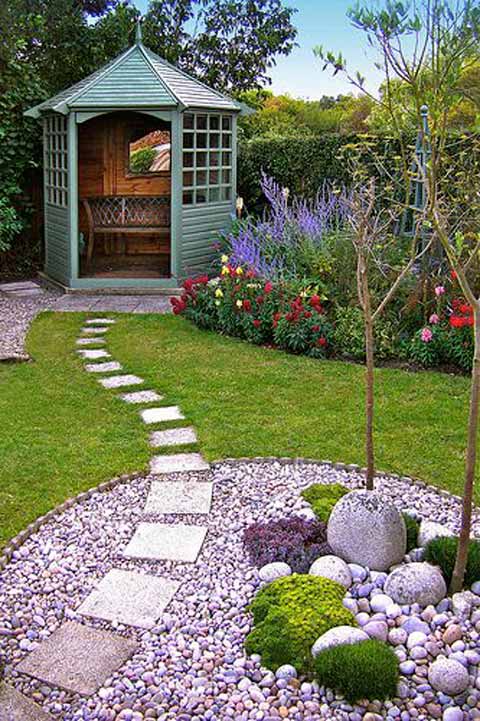
Source: flickr.com
#5. Make a colorful garden path with large flagstones and add backyard stepping stones for a unique touch.

Bottom picture: cotemaison.fr
#6. Create a river rock walkway by mixing gravel and river rocks and adorning it with concrete stepping stones made from leaf molds.
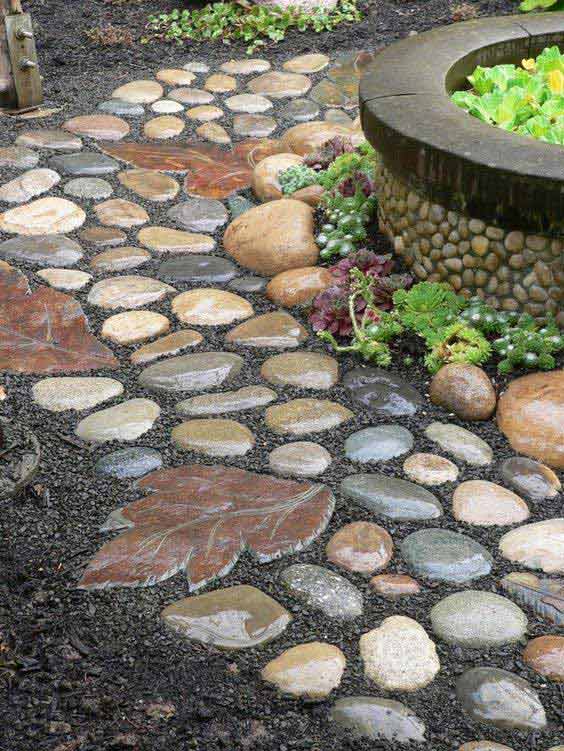
—————————————————————————————————————–
How to lay stepping-stones on gravel:
While it may be tempting to simply place the stones on the gravel, this method can lead to them becoming loose and shifting around over time. To ensure that your stepping stones remain secure and stable, you’ll need to follow some specific steps. Here’s our simple guide on how to lay stepping stones on gravel, so you can create a walkway that will last for years to come.
Step 1: Laying Out Your Landscaping Stepping Stones
To start, loosely lay out your stepping stones in the direction you want your path to take. You can measure the distance between stones, but using an equal stride usually works fine. Remember to consider the needs of those who will be using the path, and place the stones closer together if necessary. Applying PVA glue to the back of each slab can improve its grip to the mortar and prevent shifting once dry.
Step 2: Preparing the Area for Your River Rock Path with Stepping Stones
To prepare for your river rock path with stepping stones, start by removing the gravel from the area where you’ll be laying the first and last slab. This will help with leveling the remaining slabs. Once the gravel is removed, compact the area using a metal tamper, your feet, or a piece of wood to create a solid foundation that will prevent sinking. Compacting the area is an important step that shouldn’t be skipped.
Step 3: Apply Mortar Mix and Level it Out
Now that you have cleared the area where your stepping stones will be placed, it’s time to apply the mortar mix. Take a shovel full of the mix and place it onto the cleared area. Make sure to level it out with a cement trowel to create an even bed for your slab. Once the whole area is covered, gently place the slab onto the mix. You may need to adjust the amount of mortar to get the perfect finish. Once the slab is in place, move it carefully to the position you measured in step one.
Step 4: Tapping and Leveling
After placing the stepping stone in its desired location, use a spirit level to check its evenness. Then, gently tap the surface of the slab with a rubber mallet or wood-handled hammer, avoiding the edges to prevent constant readjustments. This will help spread the mortar mix, but there may be gaps remaining underneath the slab that need to be filled.
Step 5 – Securing Stepping Stones with Mortar
To secure the stepping stones in place, you need to point mortar up and around the sides of the slab. First, fill any gaps underneath the slab and then add mortar up to three-quarters of the side of the slab to create a small buttress. This will prevent the slab from sliding off the mortar. After adding the mortar, use a spirit level to ensure the slab is level and make any necessary adjustments.
Step 6: Attach String Line to Laid Slabs Using Line Pins
Once the two end stepping stones are securely in place, it’s time to position the rest of the path. The easiest way to do this is to attach a string line to the side of the two slabs. Hammer a metal line pin into the ground next to each slab, making sure they are in line with one another, and fasten the string line to the pins, making sure it is taut.
Step 7 – Laying Stepping Stones Along a Gravel Path with a String Line
With the string line in place, lay the remaining stepping stones in line with it. Follow the same method as described above for each slab. Once all the slabs are in place, use a spirit level to ensure they are level with each other. However, keep in mind that the ground may not be perfectly level before laying the slabs, which could affect the end result.
Step 8: Refill Gravel and Secure Area around Stepping Stones
After all the stepping stones are in place, remove the string line and pins and refill the gravel around the slabs. Take care not to disturb the slabs, which will take 24-48 hours to dry completely. To prevent accidental damage, secure the area around them using timber planks, string, or tape. Wait at least 24-48 hours before removing the protection and walking on the surface of the slabs.
——————————————————————————————————————
#7. Top a white gravel path with wooden pallets or square cut stones to create a rustic look.
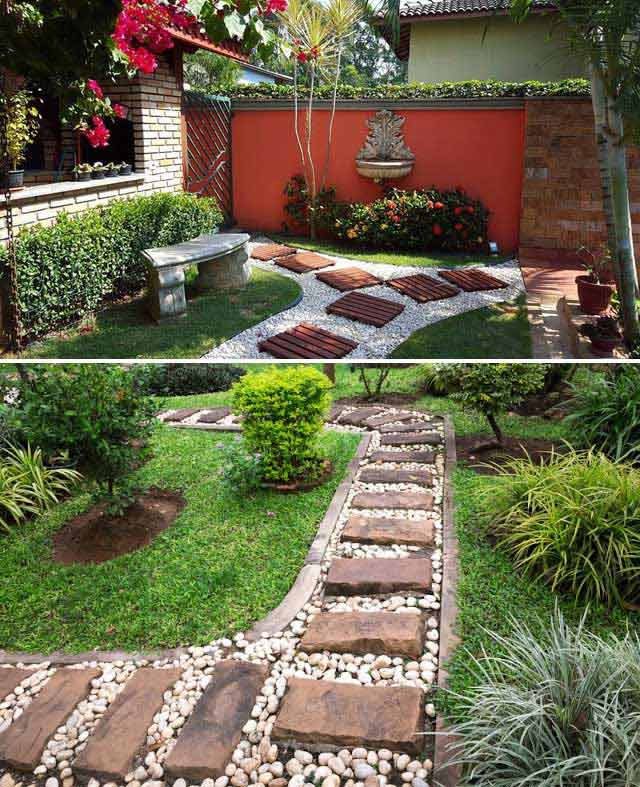
Above picture: facebook.com/tonaminhacasa Bottom picture: designinnova.blogspot.com
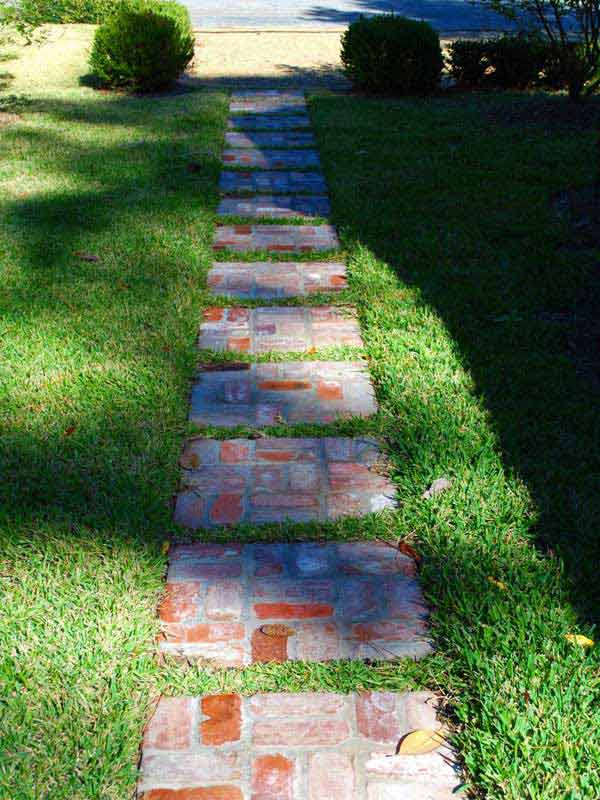
#8. Use brick stepping stones to cover a gravel path and give it a more classic appearance.

Left picture: Source Unknown. Right picture: balconygardenweb.com Bottom picture: hgtv.com
#9. Learn how to lay stepping stones in grass and use recycled blue glass or concrete crush as filler between round stepping stones.

Above picture: dailyherald.com
#10. Combine dark rocks or crushed gravel with large white paving stones to create a striking river rock pathway.

#11. Create a blend of textures with grass (Creeping Sedums, Blue Star Creeper, Creeping Thyme, and Sagina Subulata) and stepping stones for a natural look.
How to Lay Stepping Stones on Grass
Laying stepping stones on grass can be a great way to add charm and functionality to your garden. Here are some easy steps to follow:
1. Plan Your Pathway
Decide where you want your pathway to go and mark it out with string or spray paint. Take note of the shape and size of your stepping stones, and plan out the spacing accordingly.
2. Prepare the Ground
Mow the grass as short as possible and remove any debris, such as sticks or rocks, that may be in the way. It’s also a good idea to lightly water the area to help the ground settle.
3. Dig the Holes
Using a spade or trowel, dig holes for your stepping stones. The depth of the holes should be equal to the thickness of your stepping stones plus an additional inch of space for a layer of sand.
4. Add a Layer of Sand
Pour a layer of sand into each hole and level it out. The sand will help to level the stepping stone and prevent it from sinking into the ground.
5. Place the Stepping Stones
Place each stepping stone into the hole and make sure it’s level. If the stone isn’t level, adjust the sand as needed.
6. Fill in the Gaps
Once all the stones are in place, fill in the gaps around them with soil or grass seed. Water the area lightly to help the grass grow.
By following these simple steps, you can create a beautiful and functional pathway in your garden using stepping stones. This method can also be combined with the instructions for making a gravel path with stepping stones to create a unique and versatile garden feature.
#12. Insert mosaic stepping stones into a river rock path or a red brick or grass pathway for a decorative touch.
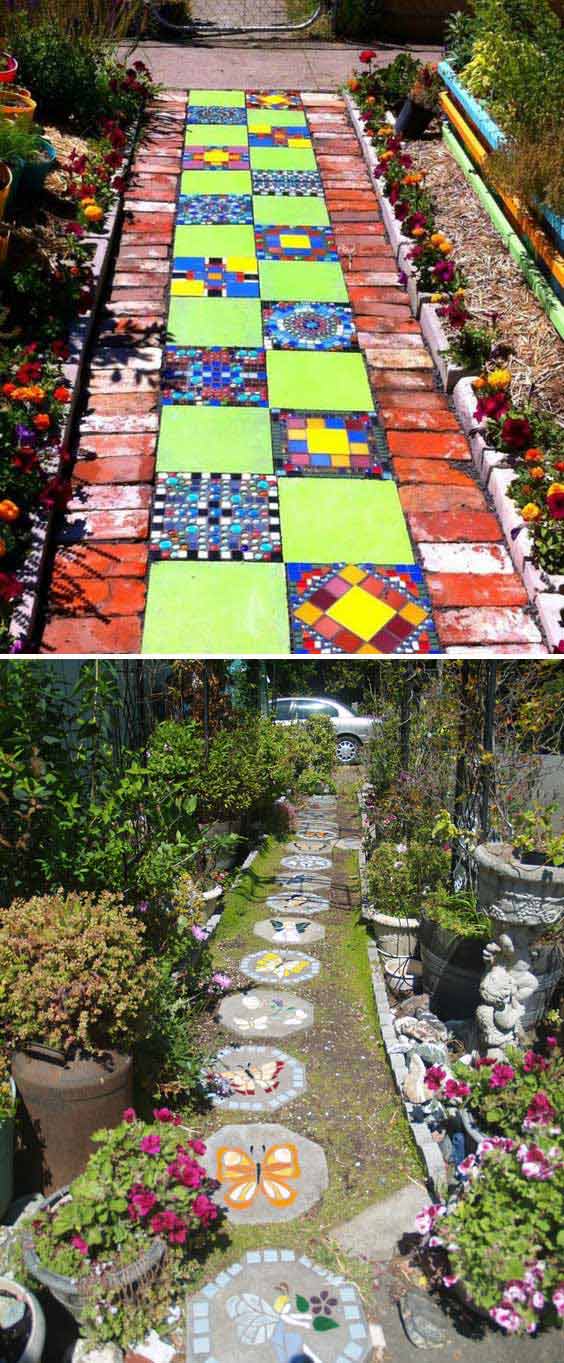
Above picture: freshouse.de Bottom picture: flickr.com

Source: viherpiha.fi


Source: diynetwork.com


Source: flickriver.com